Docker 部署lnmp
 金鹏
2022-01-12 22:01:52
金鹏
2022-01-12 22:01:52
导读:部署lnmp关闭防火墙、关闭selinux[root@docker-server ~]# setenforce 0[root@docker-se...
部署 lnmp
关闭防火墙、关闭selinux
[root@docker-server ~]# setenforce 0
[root@docker-server ~]# sed -ri 's/^(SELINUX=).*/\1disabled/g'  /etc/selinux/config   //永久关闭selinux
[root@docker-server ~]# systemctl stop firewalld
[root@docker-server ~]# systemctl disable firewalld    //开机不启动防火墙
下载所需要的镜像 (nginx 1.12.2 ,mysql 5.7,php 7.2) 版本可自选
获取 Mysql 5.7 镜像
[root@docker-server ~]# docker pull mysql:5.7
5.7: Pulling from library/mysql
5e6ec7f28fb7: Pull complete
4140e62498e1: Pull complete
e7bc612618a0: Pull complete
1af808cf1124: Pull complete
.....此处省略
启动容器 cs_mysql
[root@docker-server ~]# docker run -d -p 3306:3306 -e MYSQL_ROOT_PASSWORD=chens --name cs_mysql mysql:5.7
8cb2b1568775f01286a9b9f17979585ac582166644ab6b3ed24dea7e4d977357
参数说明
-d 让容器在后台运行
-p 添加主机到容器的端口映射
-e 设置环境变量,这里设置mysql的root用户的初始密码
-name 容器的名称、只要求唯一性
获取php 7.2镜像
[root@docker-server ~]# docker pull php:7.2-fpm
7.2-fpm: Pulling from library/php
5e6ec7f28fb7: Already exists
cf165947b5b7: Pull complete
7bd37682846d: Pull complete
99daf8e838e1: Pull complete
5e5a056cae49: Pull complete
dc6a1020a503: Pull complete
46ccabdcf8f0: Pull complete
启动php 容器
[root@docker-server ~]# docker run -d -v /var/nginx/www/html:/var/www/html -p 9000:9000 --link cs_mysql:mysql --name cs_phpfpm php:7.2-fpm
92fc30be9a853759612646fb1bcc1067c348fedc90fc21b9c5afeb9d47506081
参数说明
-d 让容器在后台运行
-p 添加主机到容器的端口映射
-v 添加目录映射,主机上的/var/nginx/www/html映射到容器里面 的/var/www/html,如果主机没有这个目录就创建这个目录,或者映射别的目录,但是后面路径要统一
-name 容器的名字
-link 容器与另外一个容器建立联系,这样就可以在当前的容器去使用另一个容器里的服务
测试目录映射
在主机/var/nginx/www/html 目录下创建php测试页面,会直接映射到容器里面
[root@docker-server ~]# cat /var/nginx/www/html/index.php
<?
    phpinfo();
?>

//看直接映射到了容器内部了
[root@docker-server ~]# docker exec -it 92fc30be9a85 /bin/bash   //进入到php的容器里面了
root@92fc30be9a85:/var/www/html# ls
index.php
php的扩展安装
安装php-redis
root@92fc30be9a85:~# pecl install redis && docker-php-ext-enable redis
downloading redis-4.2.0.tgz ...
Starting to download redis-4.2.0.tgz (235,569 bytes)
.................................................done: 235,569 bytes
25 source files, building
running: phpize
Configuring for:
PHP Api Version:         20170718
Zend Module Api No:      20170718
Zend Extension Api No:   320170718
enable igbinary serializer support? [no] :          //no  或者空格都可以
enable lzf compression support? [no] :
building in /tmp/pear/temp/pear-build-defaultuserJI3qgU/redis-4.2.0
running: /tmp/pear/temp/redis/configure --with-php-config=/usr/local/bin/php-config --enable-redis-igbinary=no --enable-redis-lzf=no
checking for grep that handles long lines and -e... /bin/grep
checking for egrep... /bin/grep -E
checking for a sed that does not truncate output... /bin/sed
checking for cc... cc
checking whether the C compiler works... yes
......此处省略

安装后执行  php   -m   //查看安装了那些
root@92fc30be9a85:~# php -m
[PHP Modules]
.。...此处省略
mysqlnd
openssl
pcre
PDO
pdo_sqlite
Phar
posix
readline
redis                         //这就是安装的redis
Reflection
获取Nginx 1.12.2镜像
[root@docker-server ~]# docker pull nginx:1.12.2
1.12.2: Pulling from library/nginx
f2aa67a397c4: Pull complete
e3eaf3d87fe0: Pull complete
38cb13c1e4c9: Pull complete
Digest: sha256:72daaf46f11cc753c4eab981cbf869919bd1fee3d2170a2adeac12400f494728
Status: Downloaded newer image for nginx:1.12.2
启动Nginx容器
[root@docker-server ~]# docker run -d -p 80:80 --name cs_nginx -v /var/nginx/www/html:/var/www/html --link cs_phpfpm:phpfpm --name cs_nginx nginx:1.12.2
2a8e910b40dbacf47b9487789d205e9e012bea918a7e2d0878539b7f18f23cda
参数说明
-d 让容器运行在后台
-p 添加主机到容器的端口映射
-v 添加目录映射,这里最好nginx容器的根目录最好写成和php容器中根目录一样。但是不一定非要一样,如果不一样在配置nginx的时候需要注意
-name 容器的名称
-link 容器之间建立起来联系
修改Nginx 的配置文件,使他支持php ,方式有多种,这里我直接拷贝出配置文件修改在导进去即可
[root@docker-server opt]# docker cp 2a8e910b40db:/etc/nginx/conf.d/default.conf /opt/
[root@docker-server opt]# cat default.conf
server {
    listen       80;
    server_name  localhost;
    location / {
        root   /var/www/html;                       // 修改这里默认的路径
        index  index.html index.htmi index.php;     //这里加入添加php的方式
    }
    error_page   500 502 503 504  /50x.html;
    location = /50x.html {
        root   /usr/share/nginx/html;
    }
    location ~ \.php$ {
        root           html;
        fastcgi_pass   92fc30be9a85:9000;        //这里可以用容器ID,也可以用容器IP,都具备唯一性
        fastcgi_index  index.php;
        fastcgi_param  SCRIPT_FILENAME  /var/www/html/$fastcgi_script_name;      //修改这里的路径
        include        fastcgi_params;
    }
}

修改完毕导入配置文件到Nginx 容器里面
[root@docker-server opt]# docker cp default.conf  2a8e910b40db:/etc/nginx/conf.d/default.conf
进入到容器里面重新加载配置文件
[root@docker-server ~]# docker exec -it 2a8e910b40db /bin/bash
root@2a8e910b40db:/# nginx -t             Nginx检测配置文件是否正确
nginx: the configuration file /etc/nginx/nginx.conf syntax is ok
nginx: configuration file /etc/nginx/nginx.conf test is successful
root@2a8e910b40db:/# nginx -s reload
2019/02/02 15:56:49 [notice] 24#24: signal process started
参数说明
-t 在容器里面生产一个伪终端
-i 对容器内的标准输入(STDIN)进行交互
查看所有容器映射的端口
[root@docker-server opt]# ss -anlt           注:容器映射的端口可以修改的
State       Recv-Q Send-Q                       Local Address:Port                                      Peer Address:Port
LISTEN      0      128                                      *:22                                                   *:*
LISTEN      0      100                              127.0.0.1:25                                                   *:*
LISTEN      0      128                                     :::80                                                  :::*
LISTEN      0      128                                     :::22                                                  :::*
LISTEN      0      100                                    ::1:25                                                  :::*
LISTEN      0      128                                     :::9000                                                :::*
LISTEN      0      128                                     :::3306                                                :::*
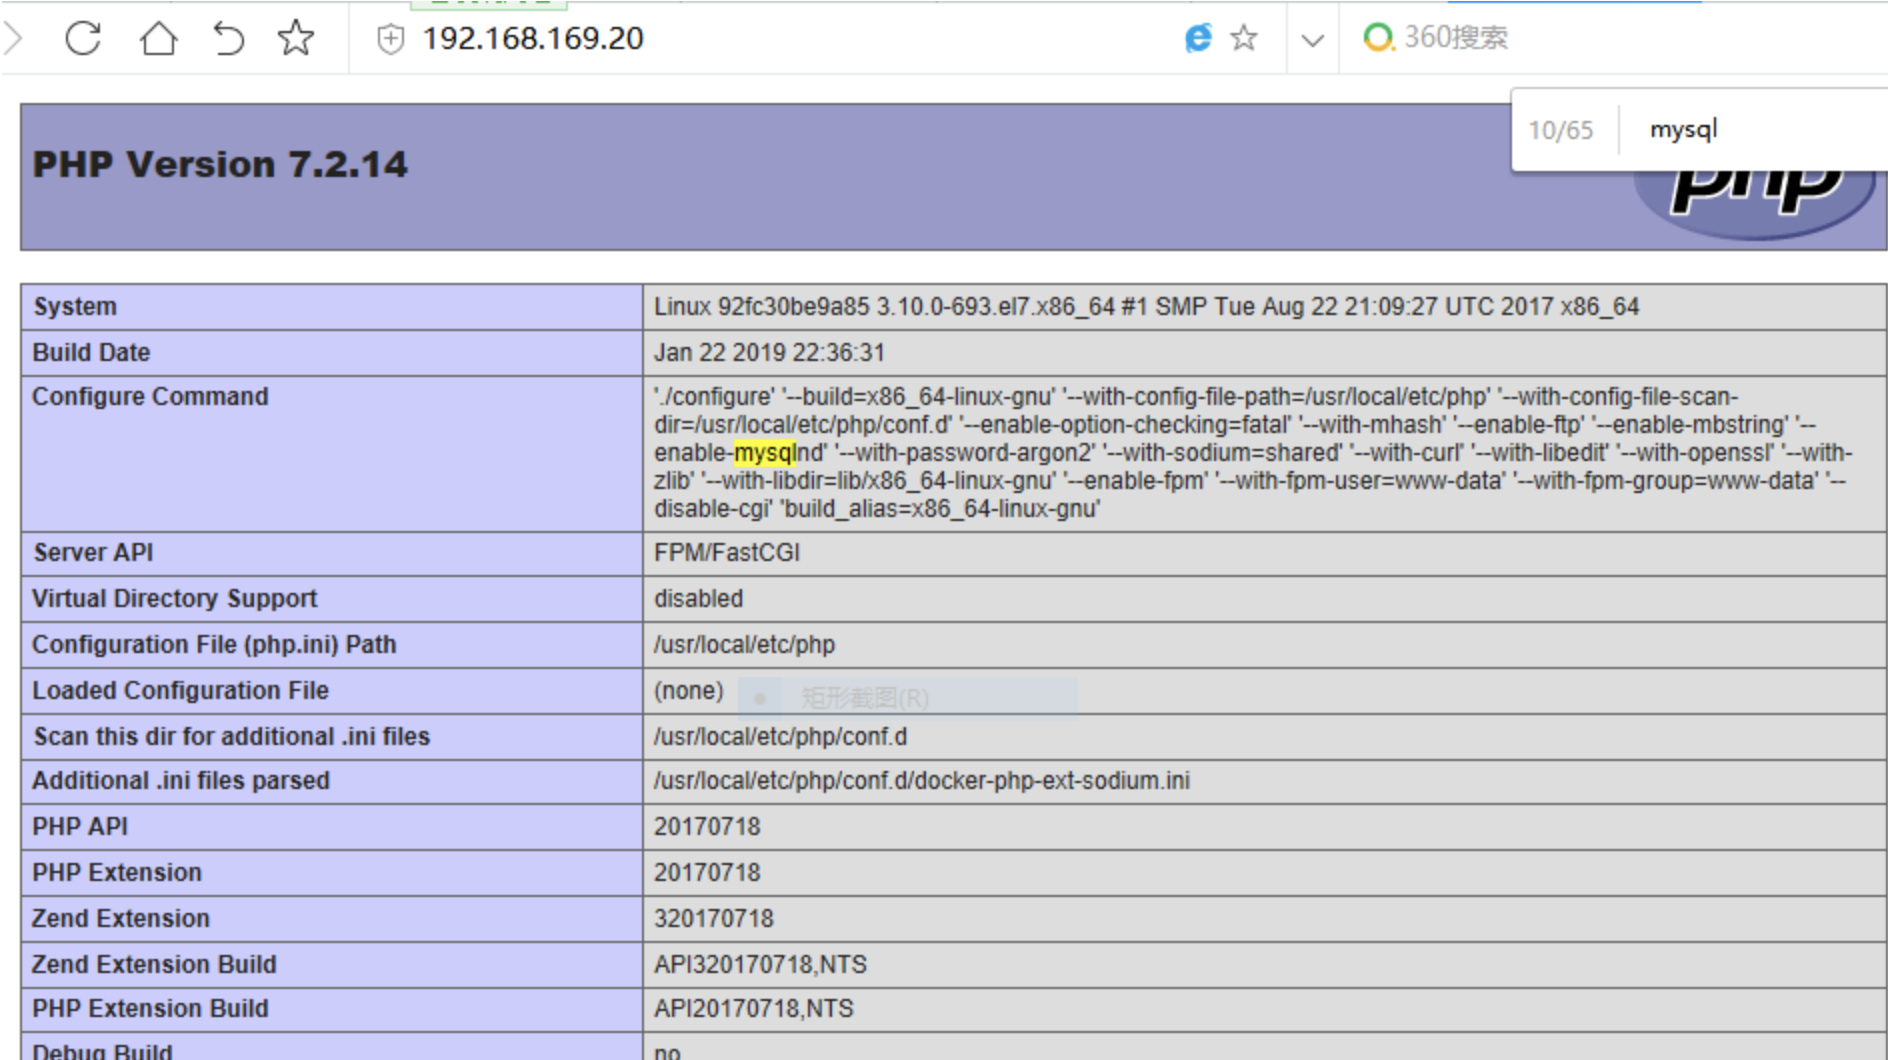
访问浏览器测试
看到这个页面说明搭建成功了!
本文地址:https://www.jinpeng.work/?id=108
若非特殊说明,文章均属本站原创,转载请注明原链接。
若非特殊说明,文章均属本站原创,转载请注明原链接。

相关推荐
欢迎 你 发表评论:
- 周排行
- 月排行
-

FFmpeg 视频转场Xfade
2021-11-02 -
ffmpeg 给视频加字幕:指定字幕位置
2023-04-06 -
FFmpeg 解决合并视频没有声音的问题
2021-10-29 -
Swoole4 [进程管理] 单进程(Process)
2022-01-02 -

Git常用命令
2021-10-25 -
Swoole4 高性能共享内存 Table
2022-01-02
-
FFmpeg 视频转场Xfade
2021-11-02 -
ffmpeg 给视频加字幕:指定字幕位置
2023-04-06 -
FFmpeg 解决合并视频没有声音的问题
2021-10-29 -
Swoole4 [进程管理] 单进程(Process)
2022-01-02 -
Git常用命令
2021-10-25 -
Swoole4 高性能共享内存 Table
2022-01-02
最近发表
-
Logstash 同步MySQL到ES
2025-04-08 -

Logstash 使用
2025-04-08 -
Vue3 自定义hook
2024-10-07 -
Vue3 生命周期
2024-10-07 -

Vue3 核心语法
2024-10-07 -

Vue3 初识
2024-10-07 -
Typescript 泛型
2024-10-07 -

Typescript 类相关
2024-10-07 -
Typescript 类型
2024-10-07 -
Typescript 初识
2024-10-07